Pairing on the FLOWBOX
Overview
This document will cover the steps to pair the FLOWBOX with our platform.
It mainly consists in :
- Powering the FLOWBOX,
- Accessing FLOWBOX Wifi Access Point,
- Configuring the FLOWBOX
- Checking that process was correctly applied
Then you'll be able to finalise the pairing process on the WebApp side and start managing your FLOWBOX.
Requirements
- The associated Zone must have been created first - see Prepare pairing step if needed
- You must have the setup instructions, filled with IT information for network configuration
- You must have a device (laptop, tablet, mobile phone) to configure the FLOWBOX. We recommend a PC for convenience and copy/paste information from setup instructions to the FLOWBOX configuration page
- FLOWBOX is plugged on your water network
Video tutorial
You can follow the process by watching the following video:
Accessing FLOWBOX Wifi Access Point
First, power on your FLOWBOX, after a few seconds and after some internal tests:
- White LED is on and stable
- Green LED is blinking slowly, meaning that it has not been configured yet.
Open your wifi network, and look for a SSID named FLOWBOX_XXXXXX. Exact value of the XXXXXX can be found on FLOWBOX label (side of the FLOWBOX)
Select this network and use the Key defined in Wifi Section of the Setup Instructions.
Switch between wifi networks
As the access point does not provide access to internet, some devices switch back to a previous known network. Please check that you are well connected to FLOWBOX Access Point when configuring the FLOWBOX.
Once connected to FLOWBOX Access Point, open your browser and go to the URL defined in Wifi Section of the Setup Instructions.
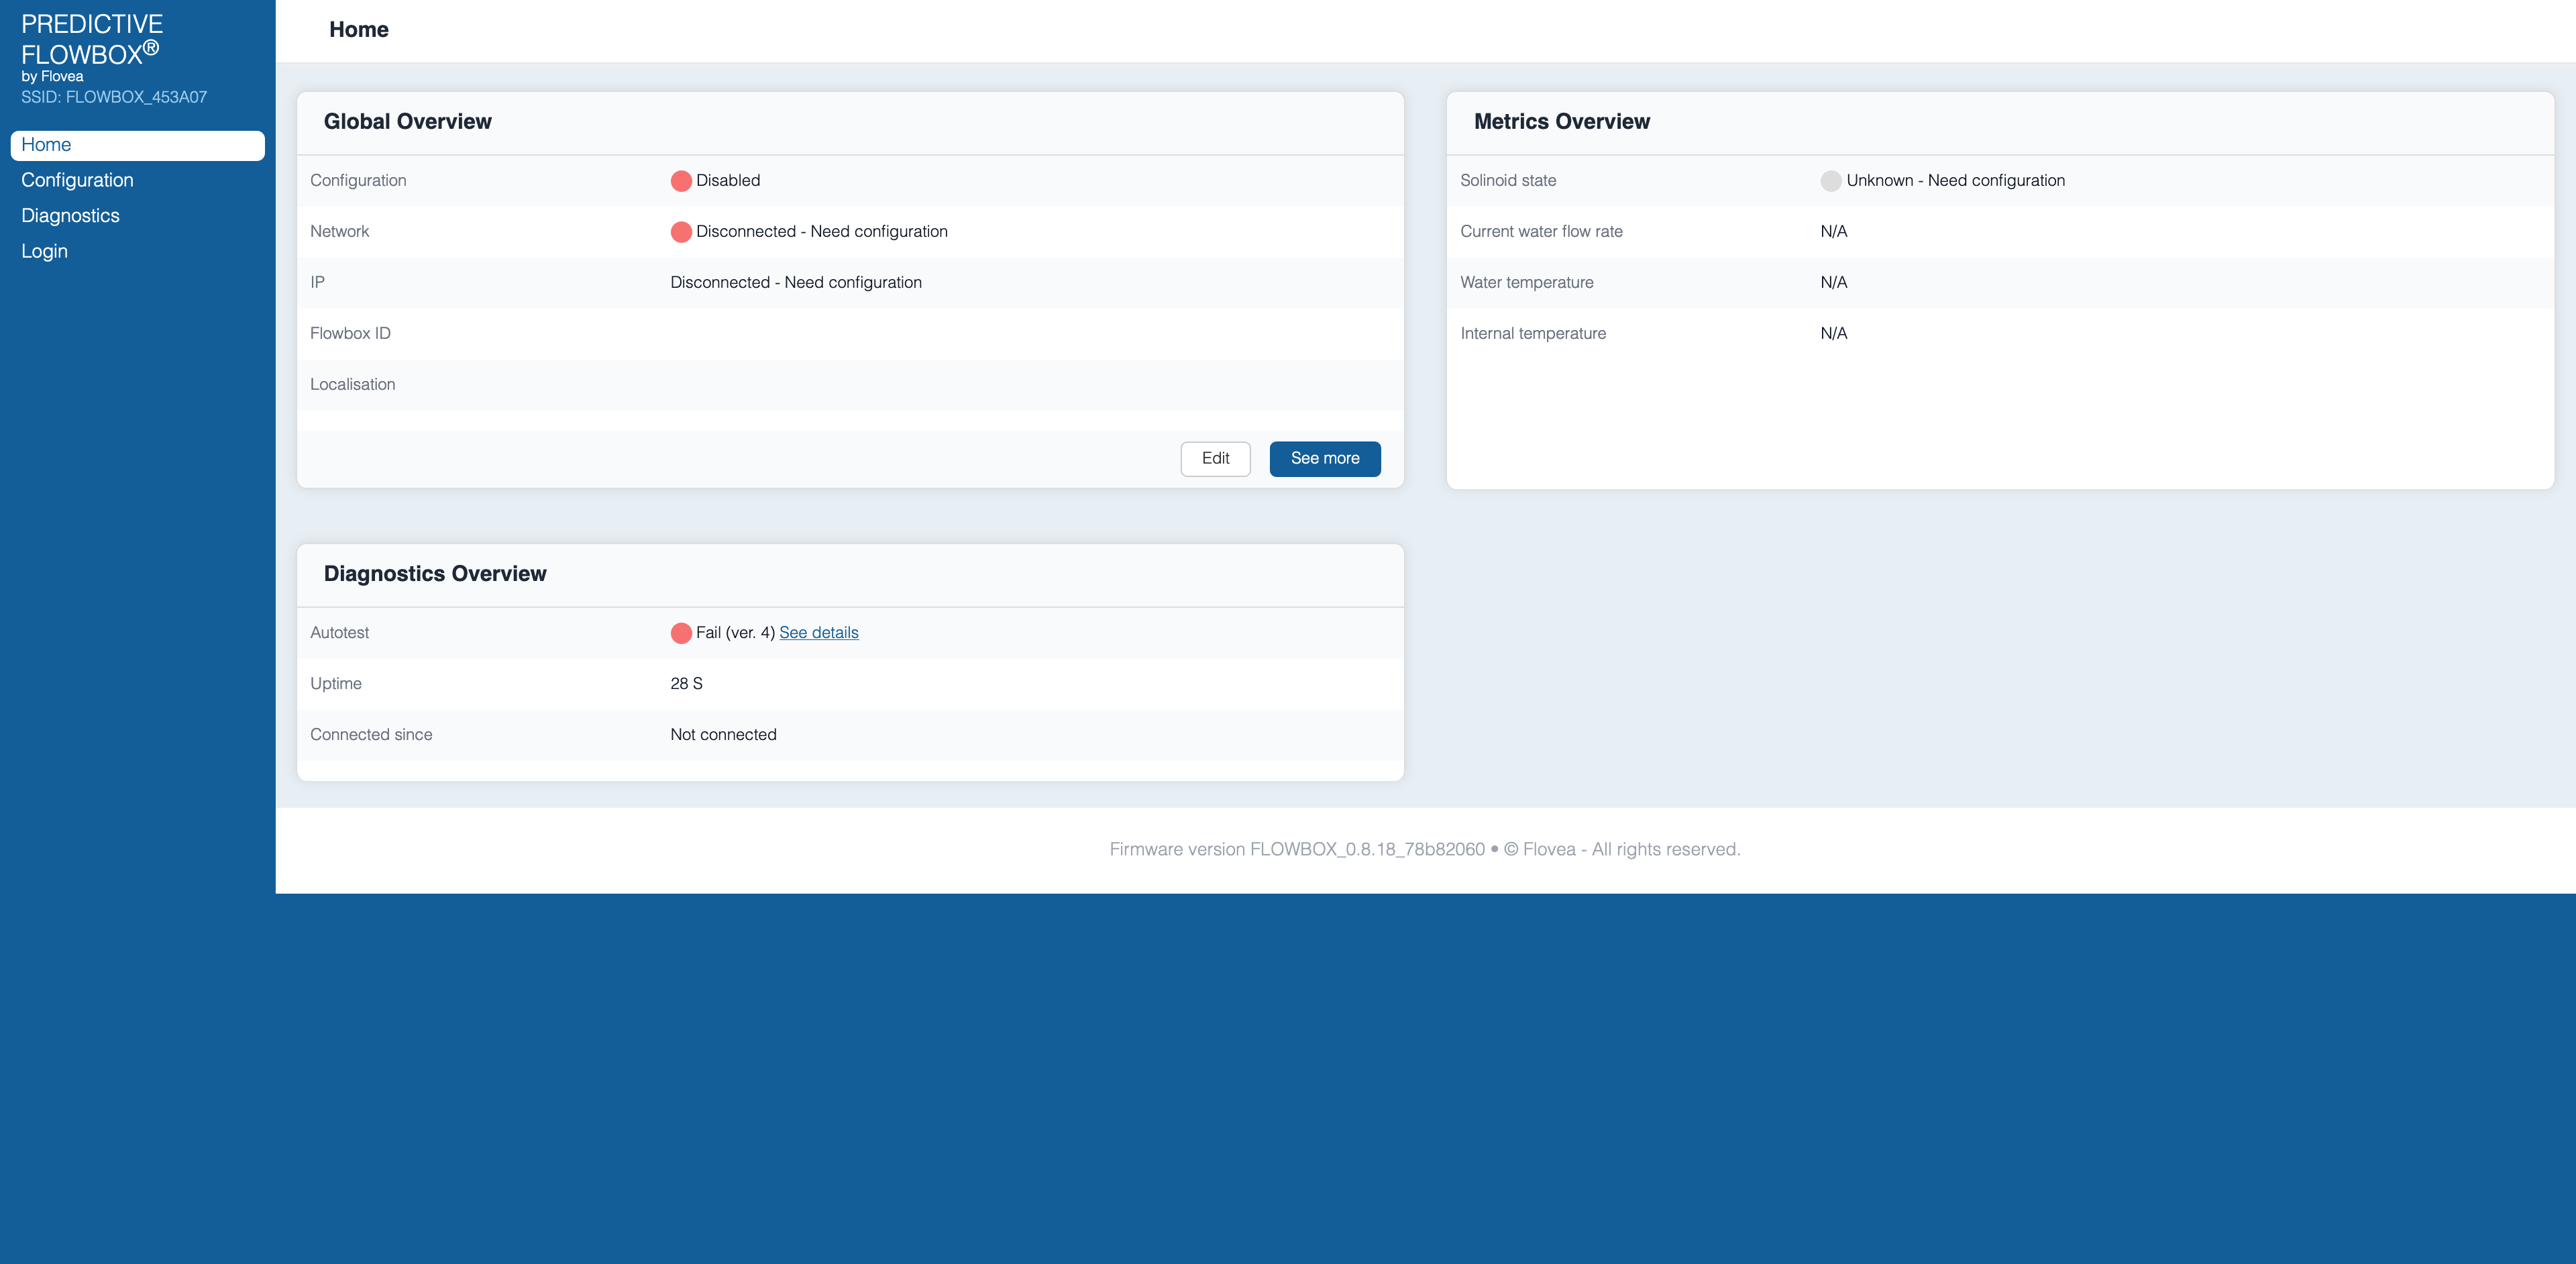
You will see this page:
Configuring the FLOWBOX
Click on the "Edit" button. You will need to authenticate. Please use the Login and Password defined in Wifi Section of the Setup Instructions. Once successfully authenticated, you are redirected to the home page. Click again on "Edit" button to enter the configuration process.
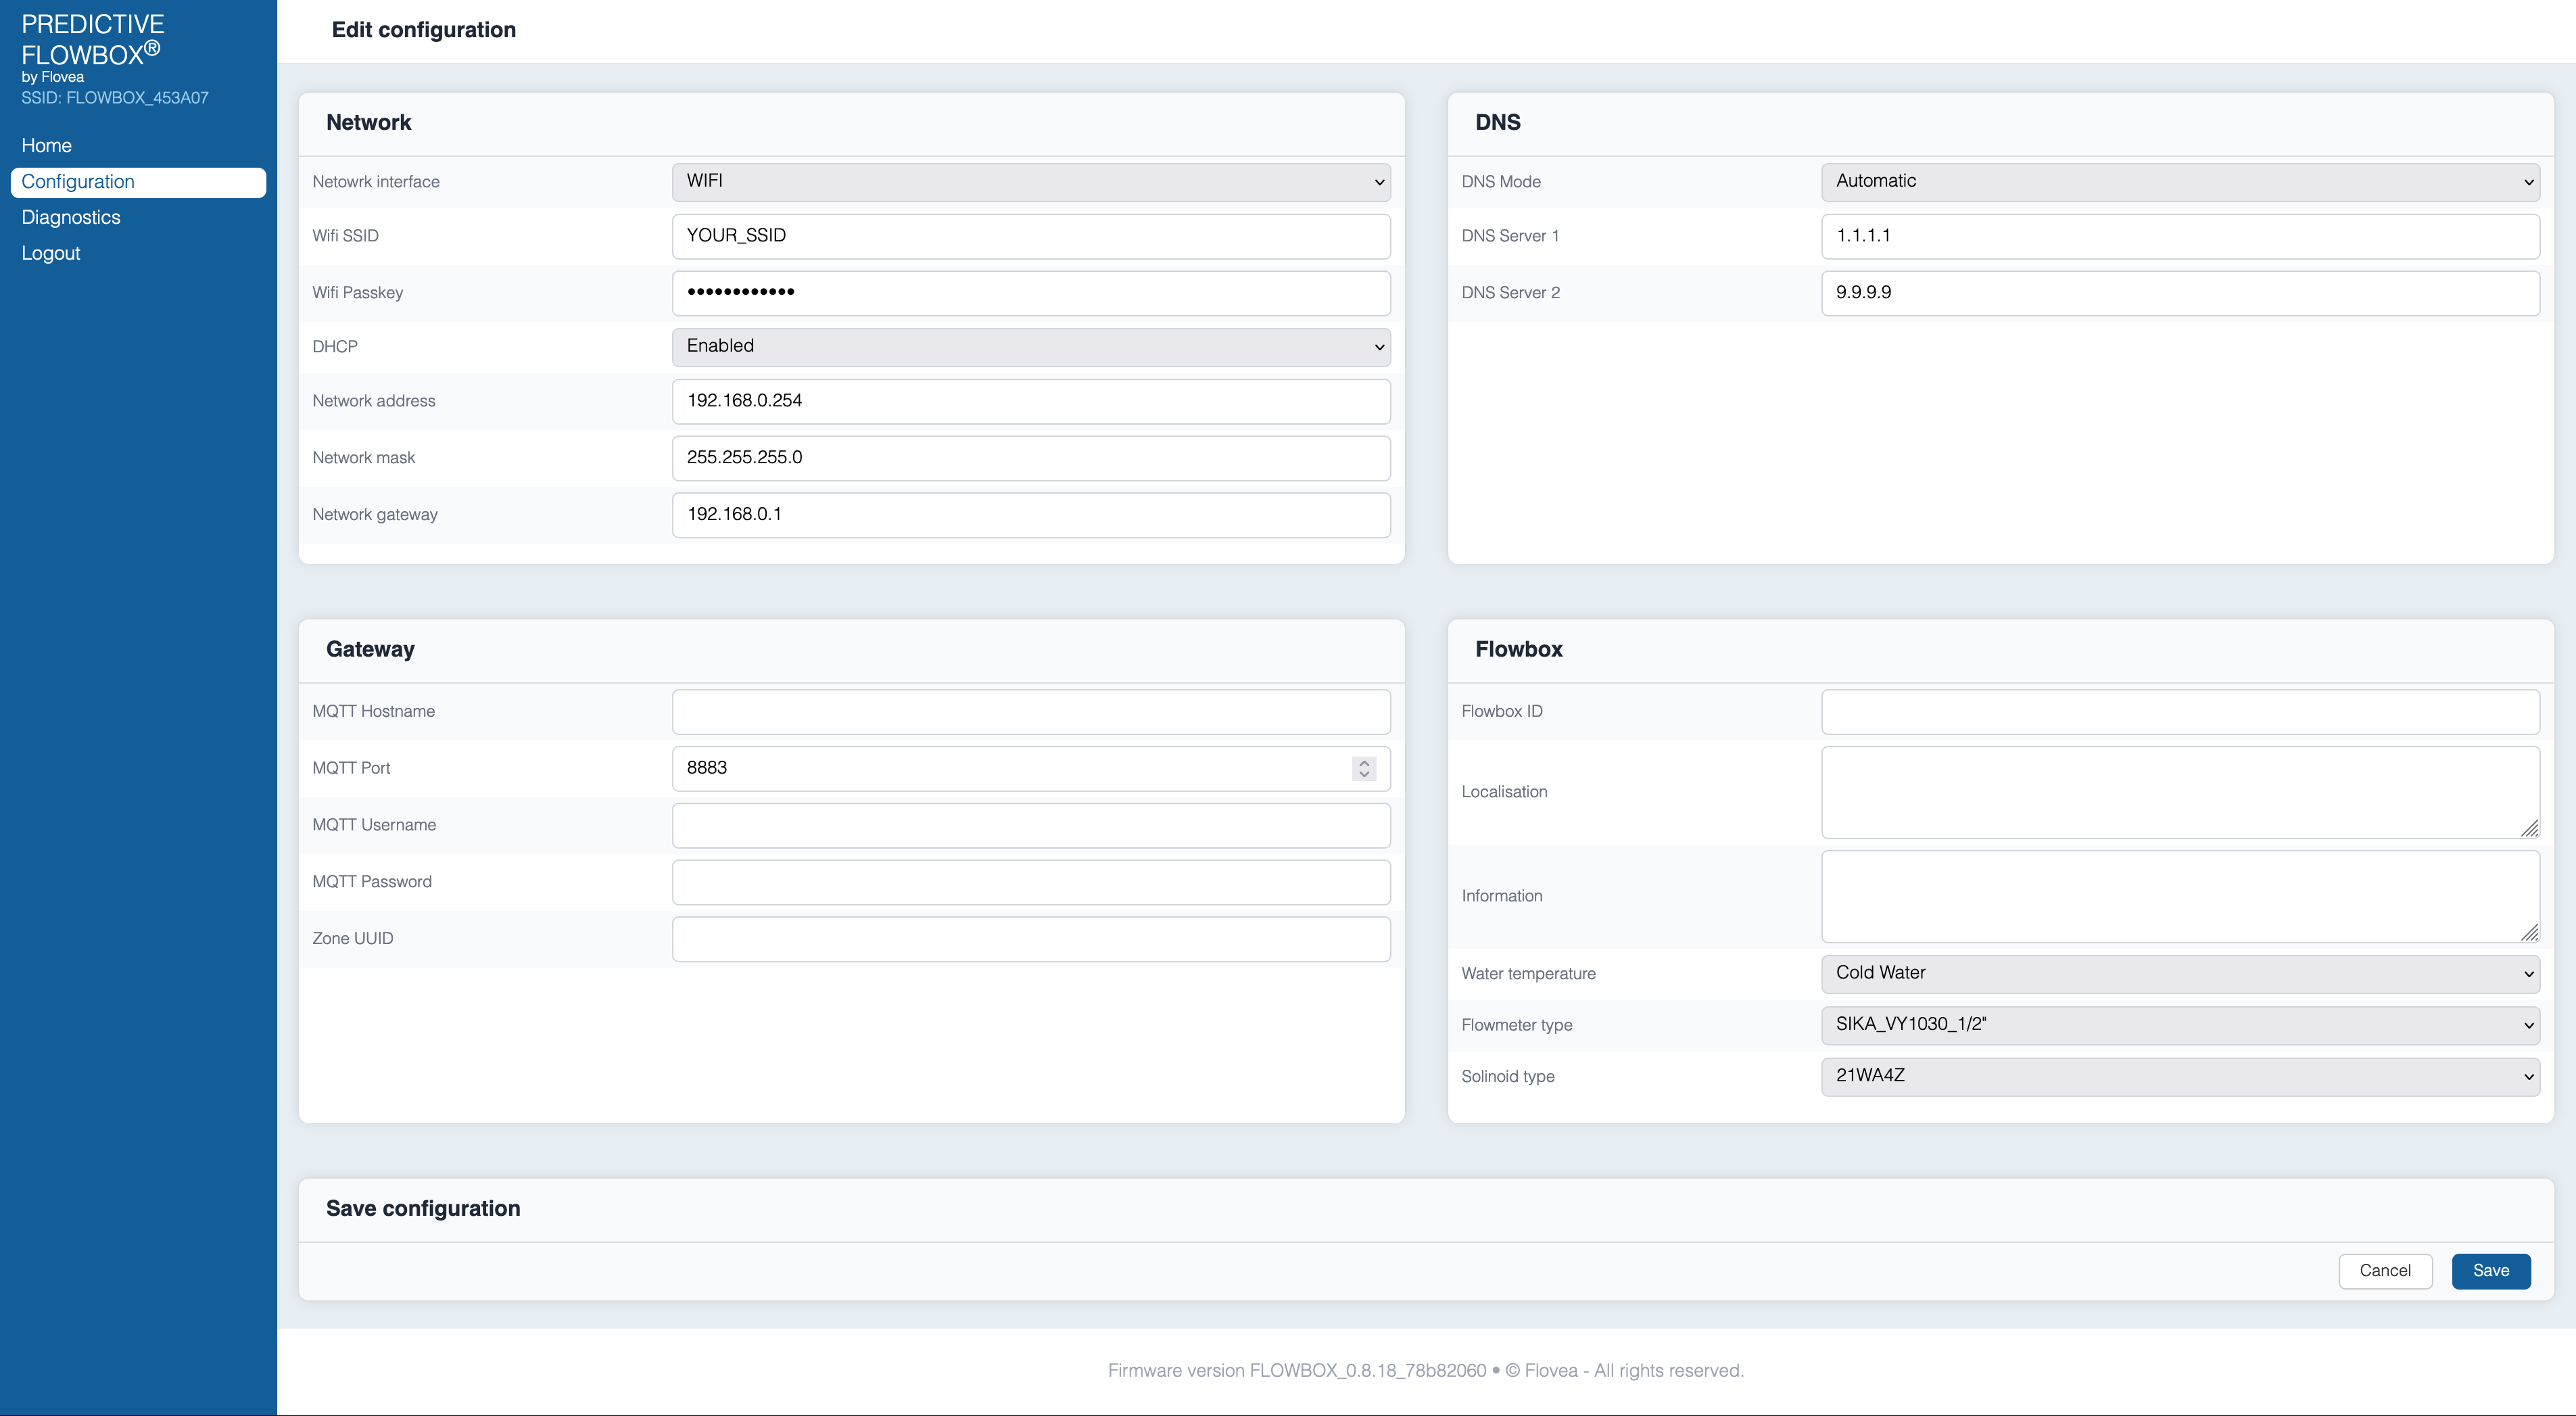
You should see the configuration page, we'll cover it section per section after.
Network configuration
For this section, information are available in the Setup Instructions in the Extra information > Network section.
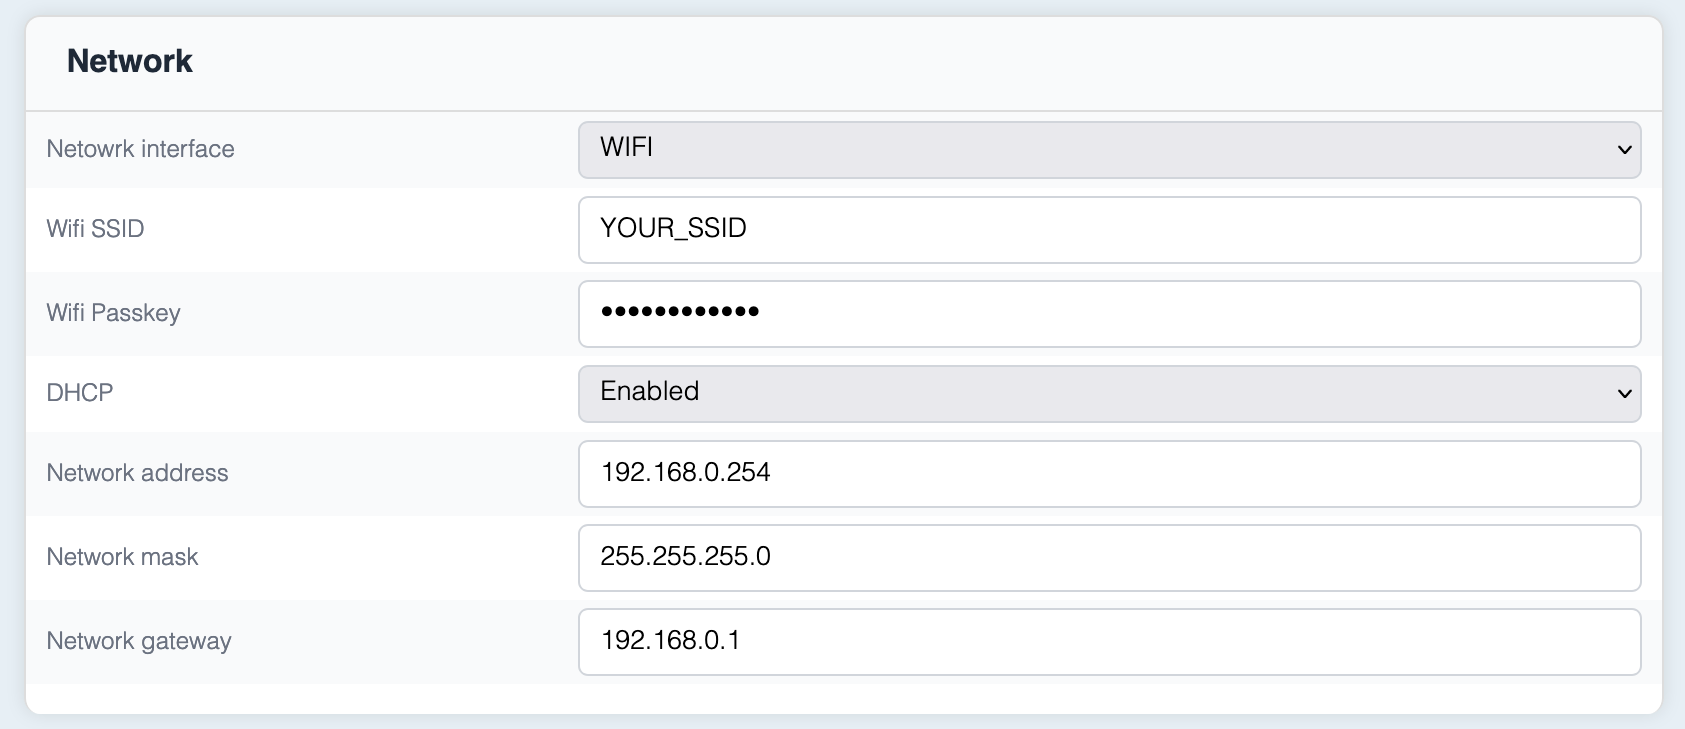
In this section you will define:
- If you connect your network via Wifi or Ethernet - select one of the two.
- If you use Wifi, then edit the Wifi SSID and Wifi Passkey fields.
- If you use Ethernet, you can ignore Wifi SSID and Wifi Passkey fields.
- For both modes, you must defined if the IP Address will be provided automatically by a DHCP server or if you will set a static IP.
- If you use a DHCP server, then keep "Enabled" for DHCP and ignore other fields.
- If you use a static IP, then select "Disabled" for DHCP and fill other fields as expected based on the information provided in the setup instruction (with the help of the IT Team)
Gateway
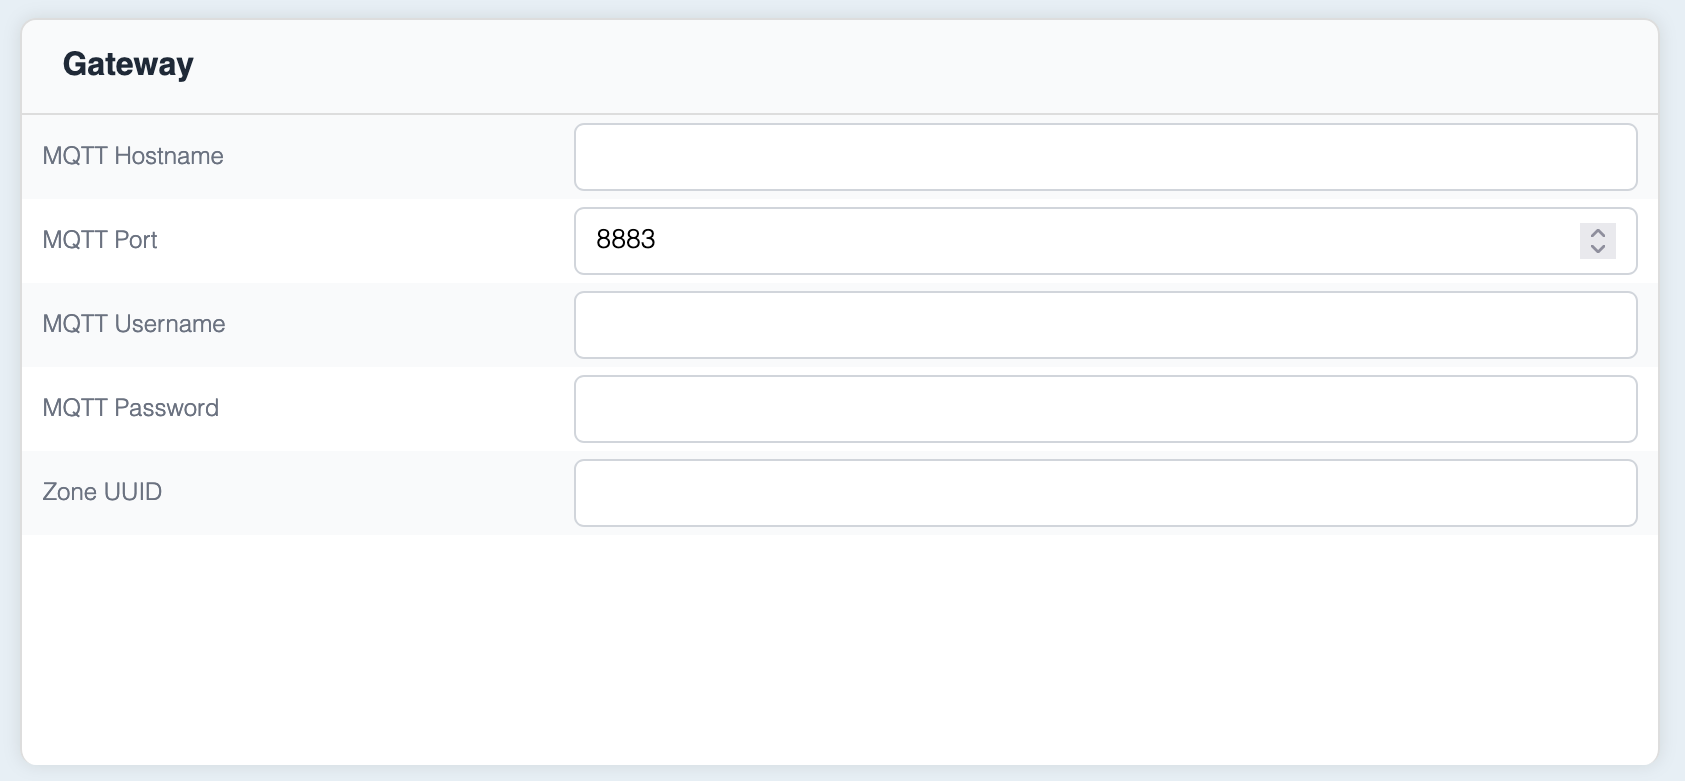
For this section, information are available in the Setup Instruction in the Setup information section. Fill the form accordingly.
Spaces
Beware to not add spaces at the beginning or the end of the fields as it would make the information invalid.
DNS
For this section, information are available in the Setup Instructions in the Extra information > Network section. Fill the form accordingly.
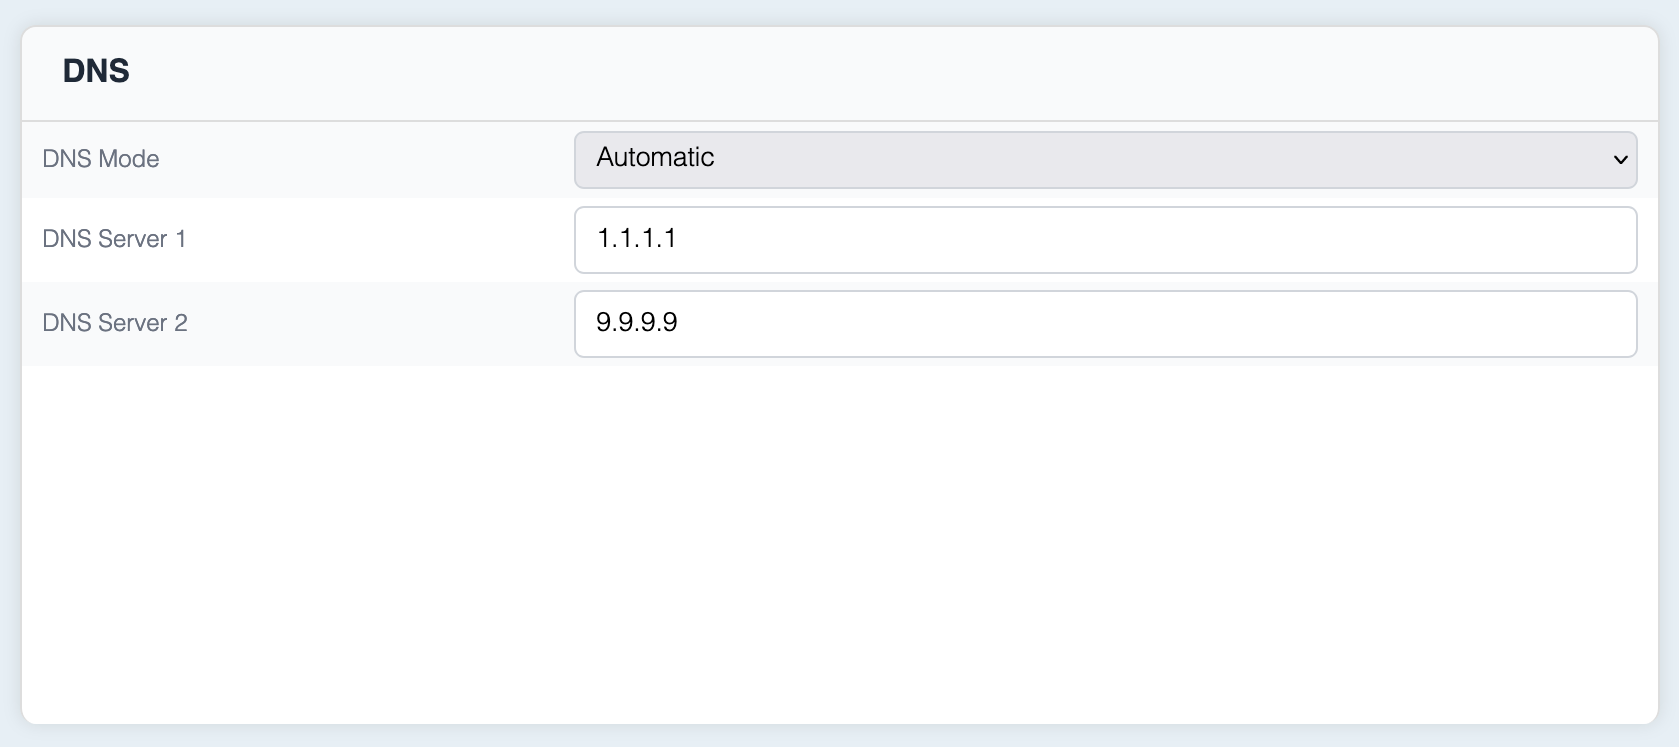
If DNS management is automatic, let the DNS field set to Automatic and ignore fields below. Otherwise, set field to manual and fill fields accordingly with information provided by the IT Team.
Flowbox
For this section, some information are available in the Setup Instructions in the Extra information > Flowbox section. Fill the form accordingly.
For FLOWBOX ID field, please refer to the serial number set on FLOWBOX label (on FLOWBOX side).
For localisation and information fields :
- Localisation will allow the operator on the webapp to confirm that the FLOWBOX is installed on the right place.
- Information may be extra information you may need to add for later use.
For Water temperature, select the appropriate value. A check will be done with value set in the WebApp. If values are not the same, it will prevent pairing.
For Flowmeter type, set the value accordingly.
Accents in localisation and information fields
Please do not use accentuated characters nor special characters. Use only alpha numerical values and English alphabet for compatibility purposes (a-z, A-Z, 0-9, punctuation, spaces)
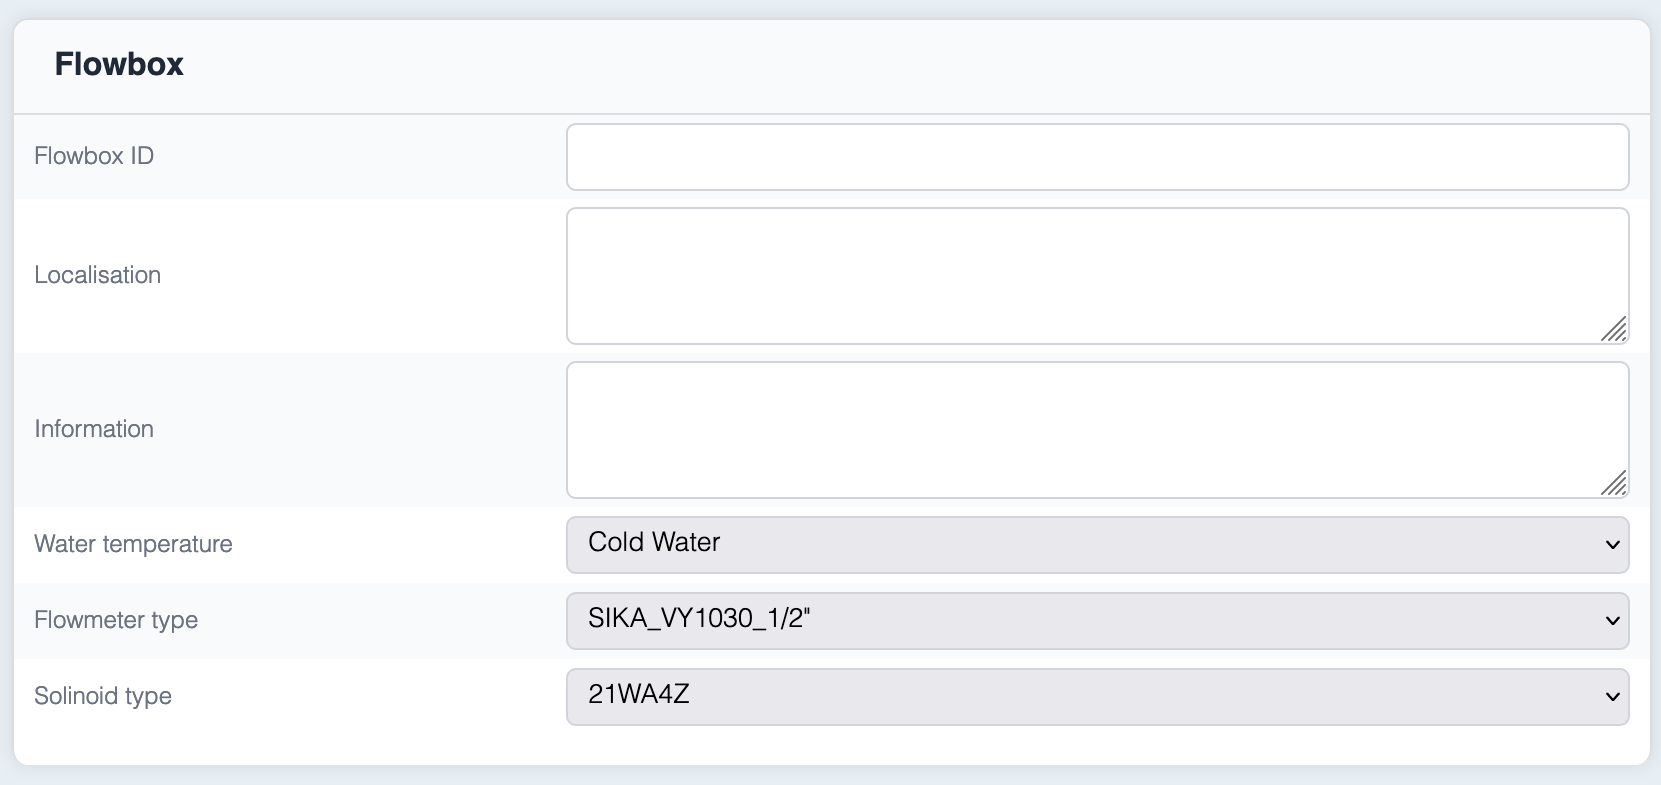
Once all the information are filled, you can click on "Save", in the bottom right corner.
Configuration review and confirmation
You will then review the form. If you are satisfied with values, you can confirm and apply settings to your FLOWBOX. Otherwise, you can edit the configuration if needed.
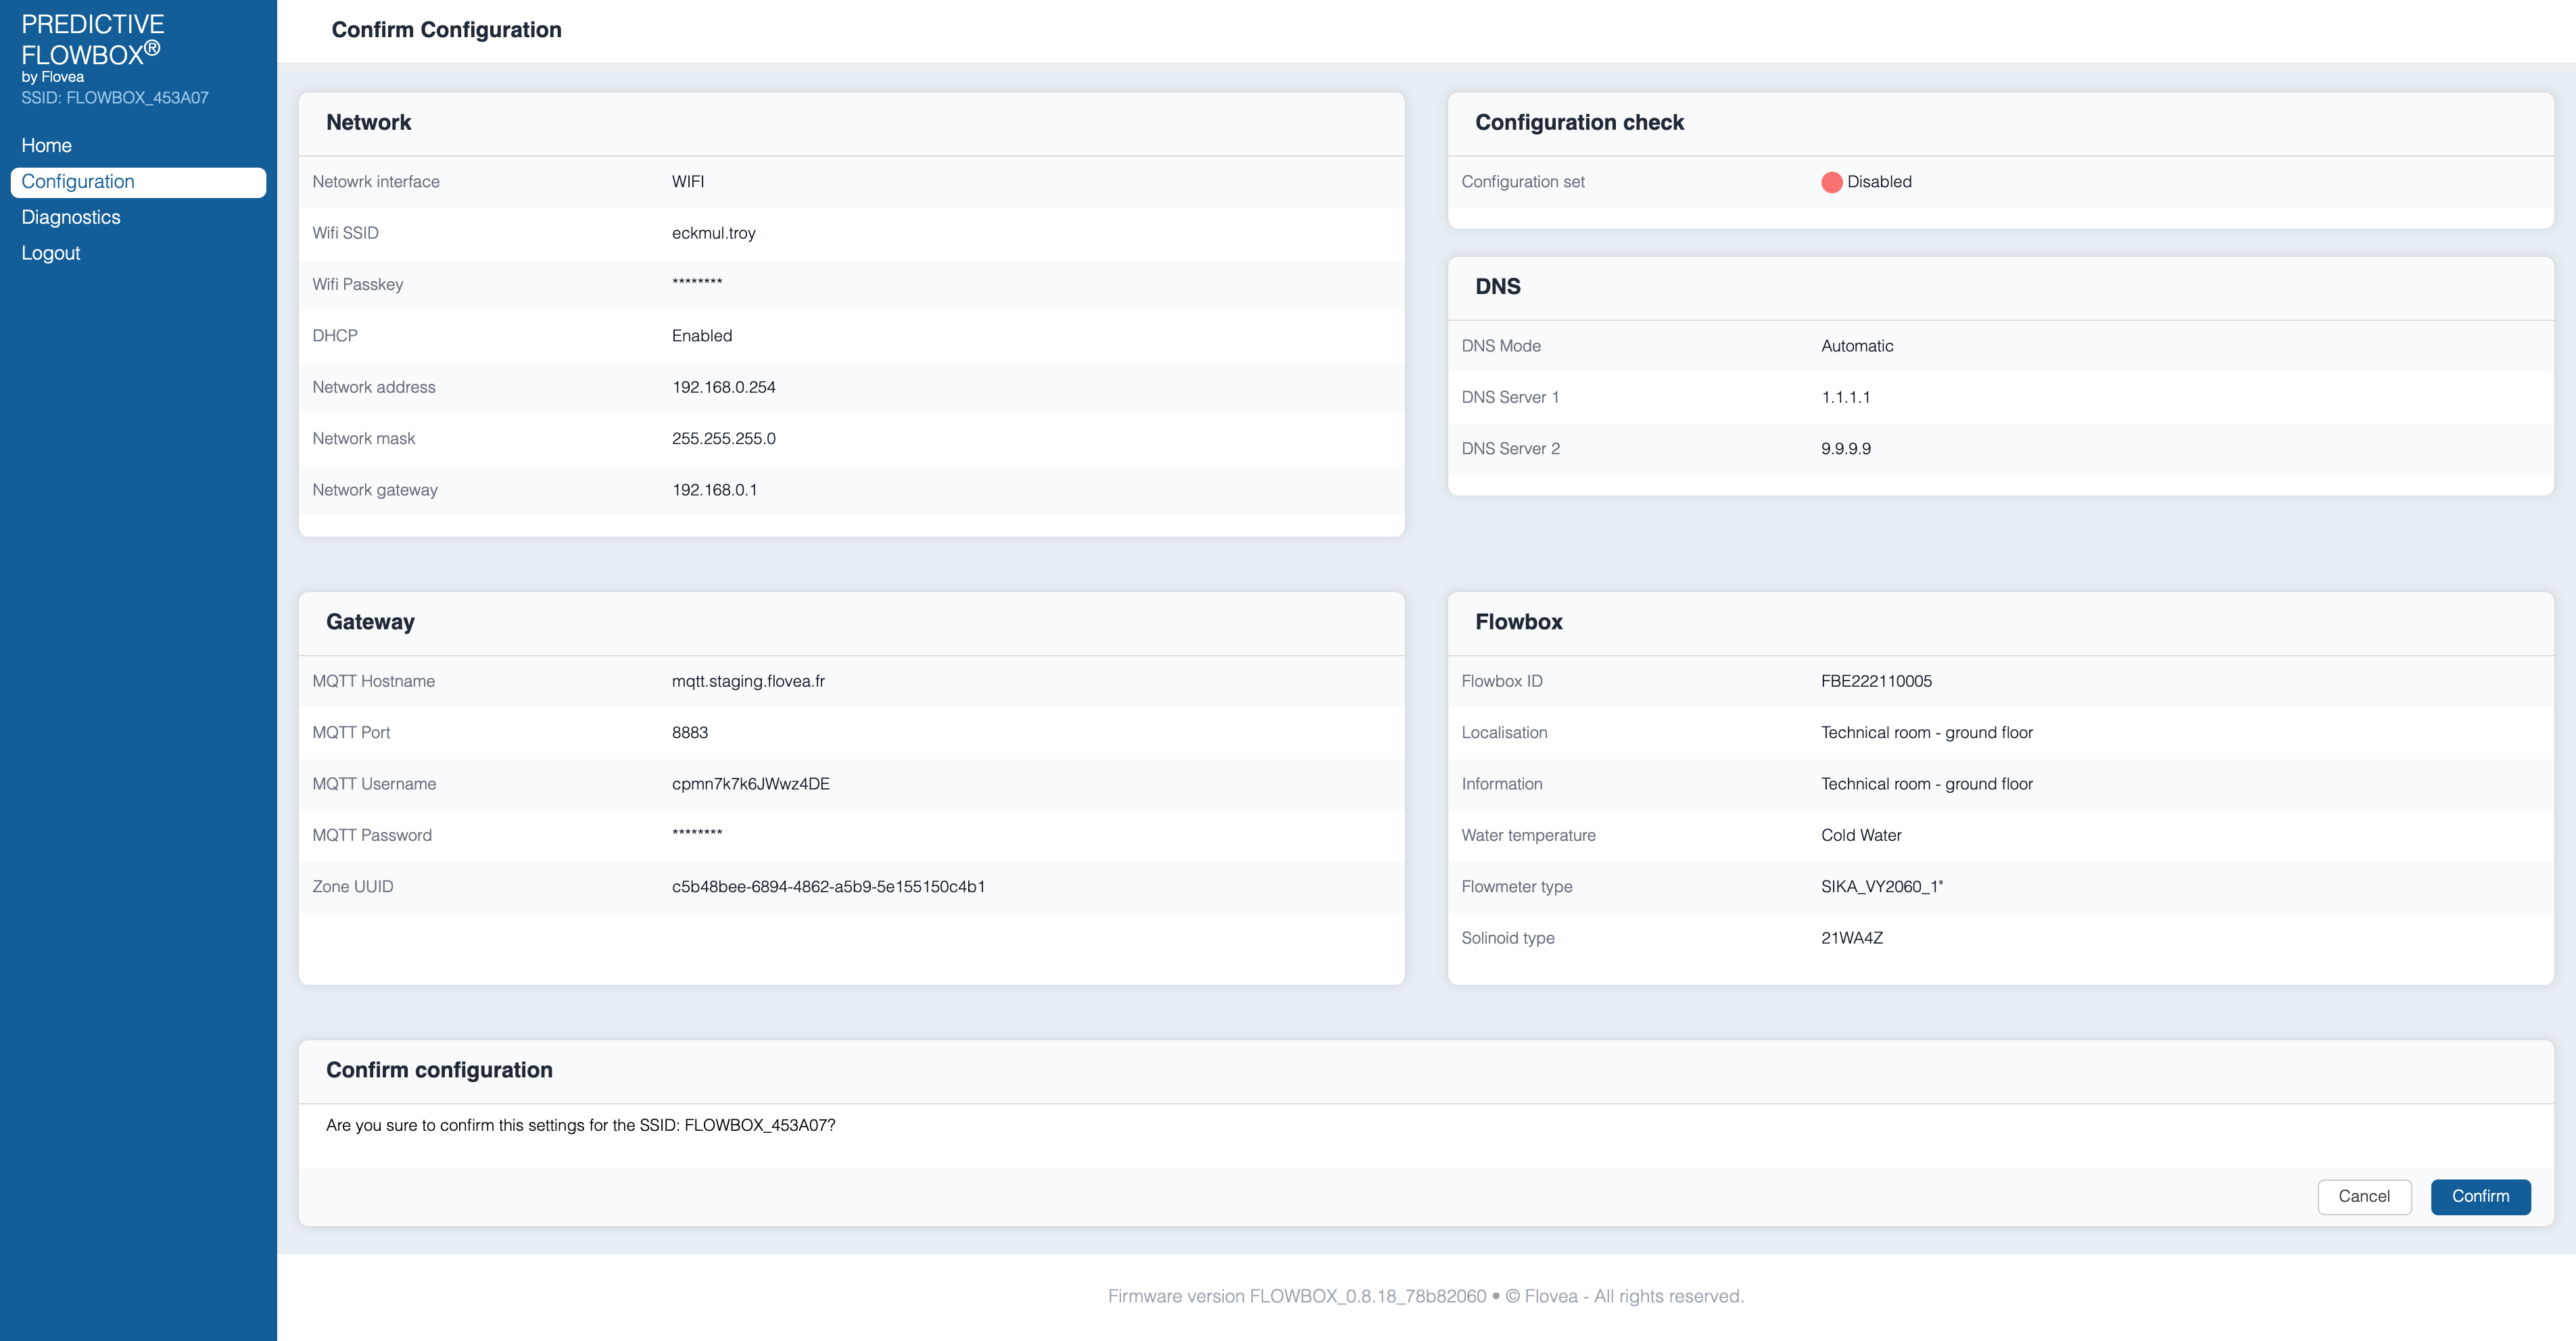
Configuration confirmation is required
If you just save the configuration but don't confirm it ; it will have no effect on your FLOWBOX. You will not be able to finalise the process.
Once you click on "Confirm" :
- Flowbox will apply your configuration and restart
- Once restarted, you can still connect to the Access Point and see if the configuration is "Enabled" and the network is "Connected" in the "Global overview" section:
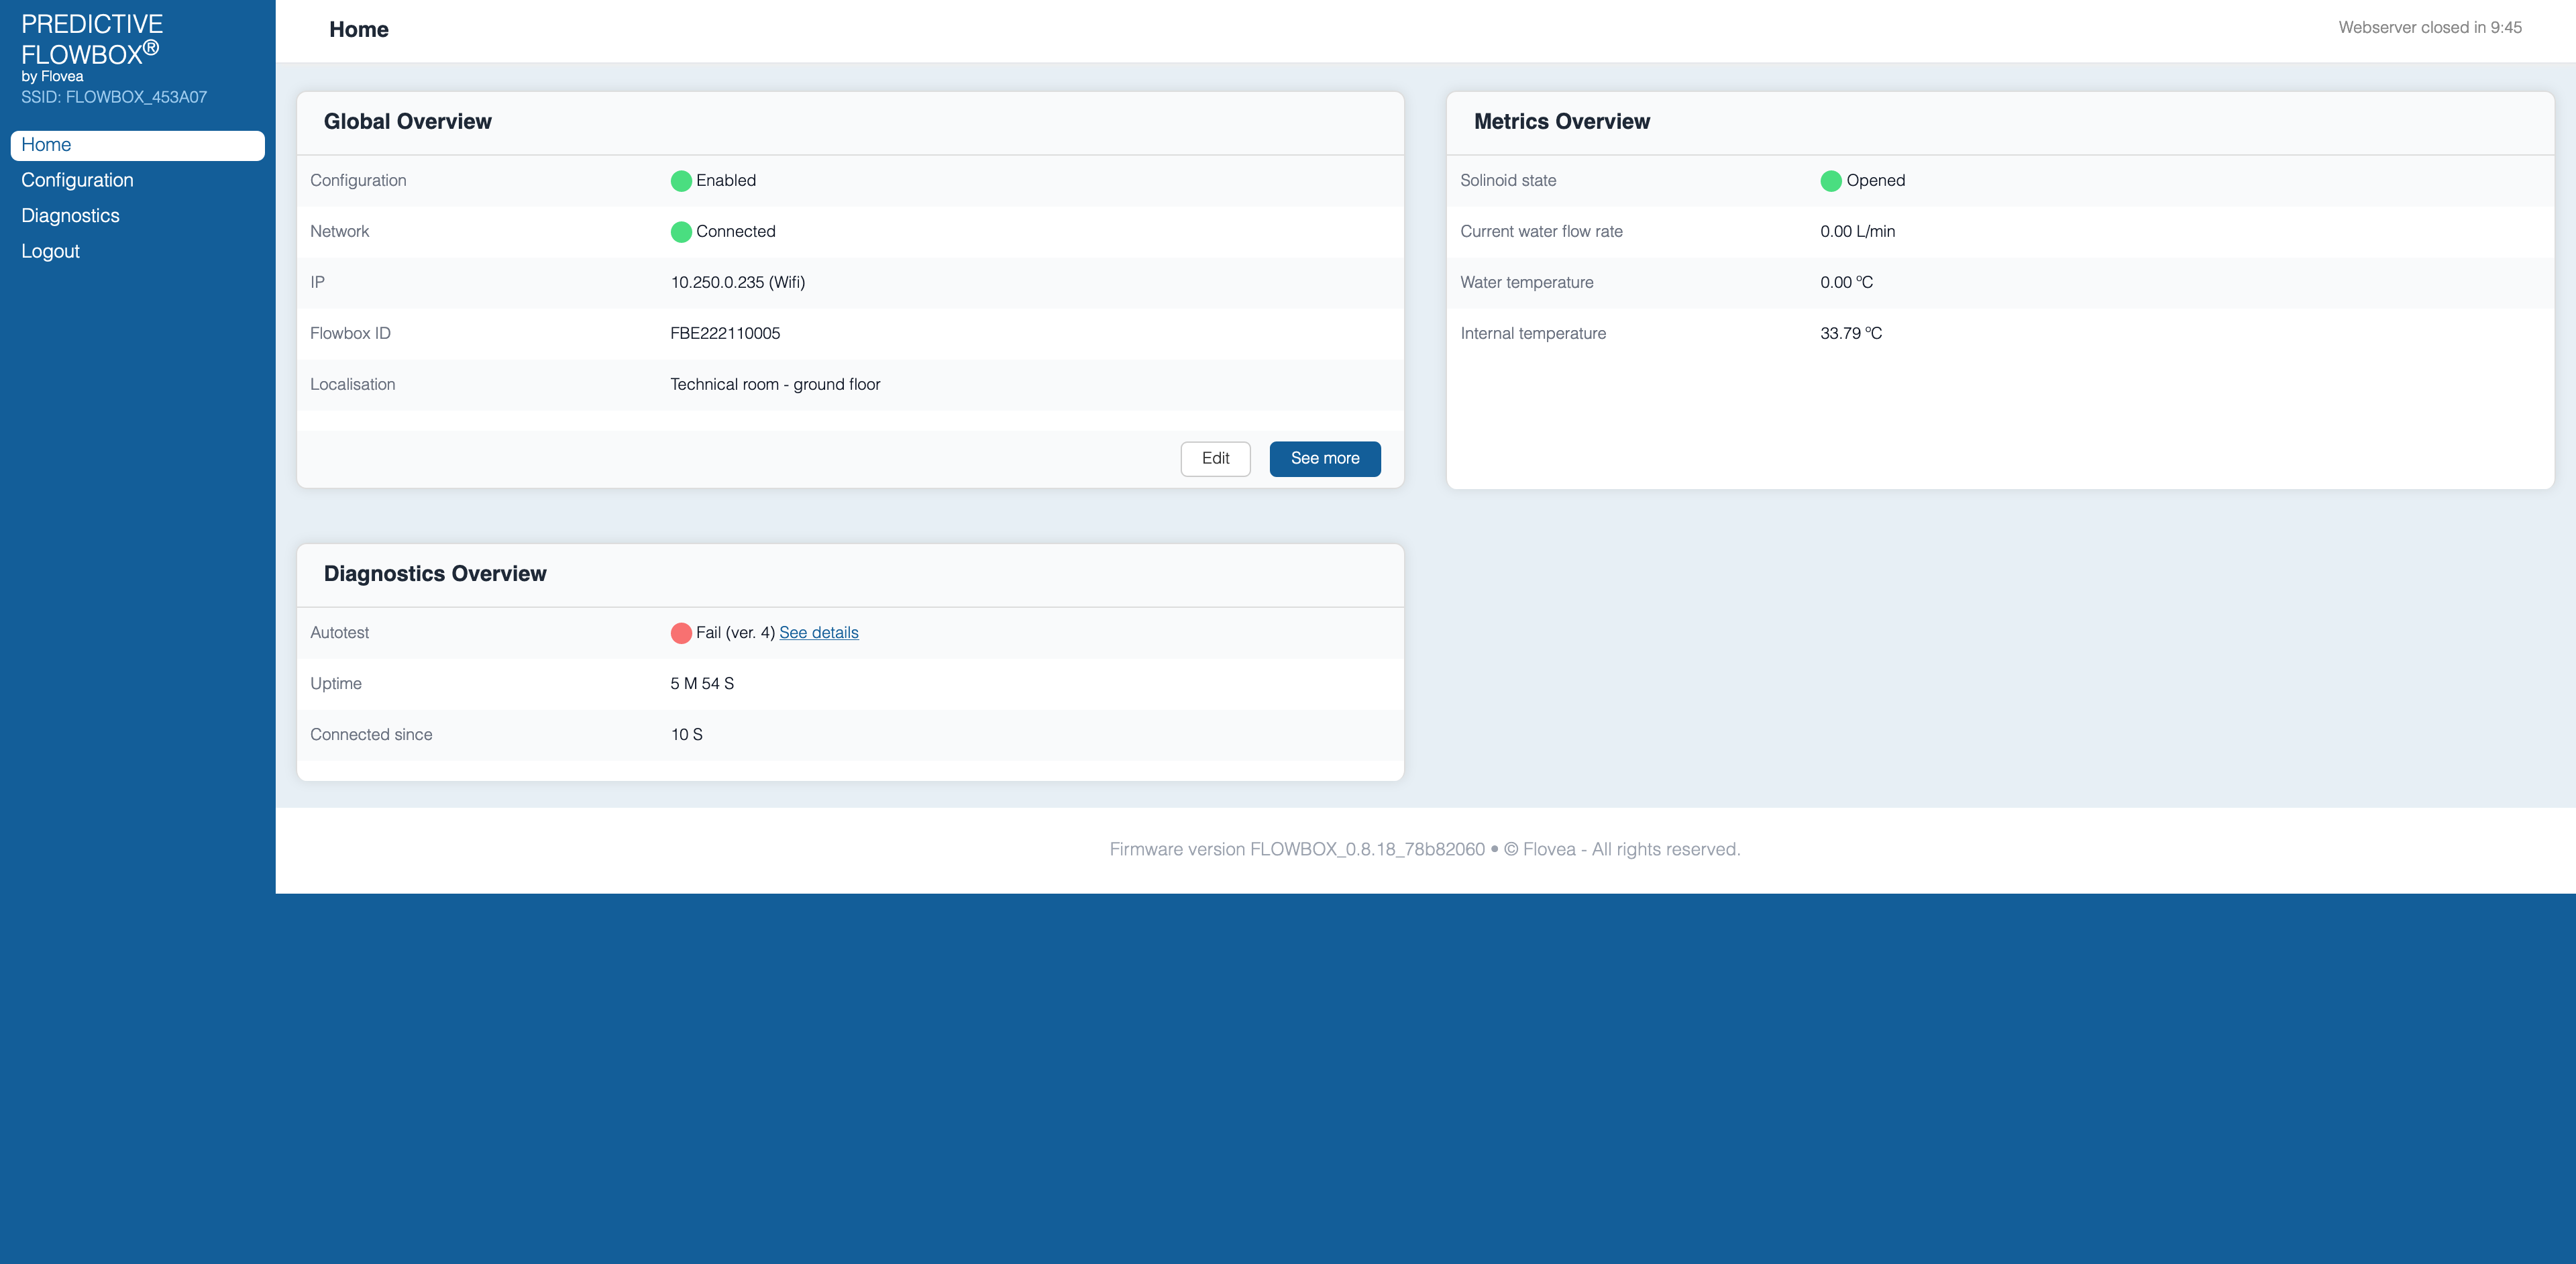
🎉 Your FLOWBOX is well configured and connected to our platform.
You can now finalise the pairing.
Diagnostics
For more details, you can click on the "Diagnostics" button in the left menu
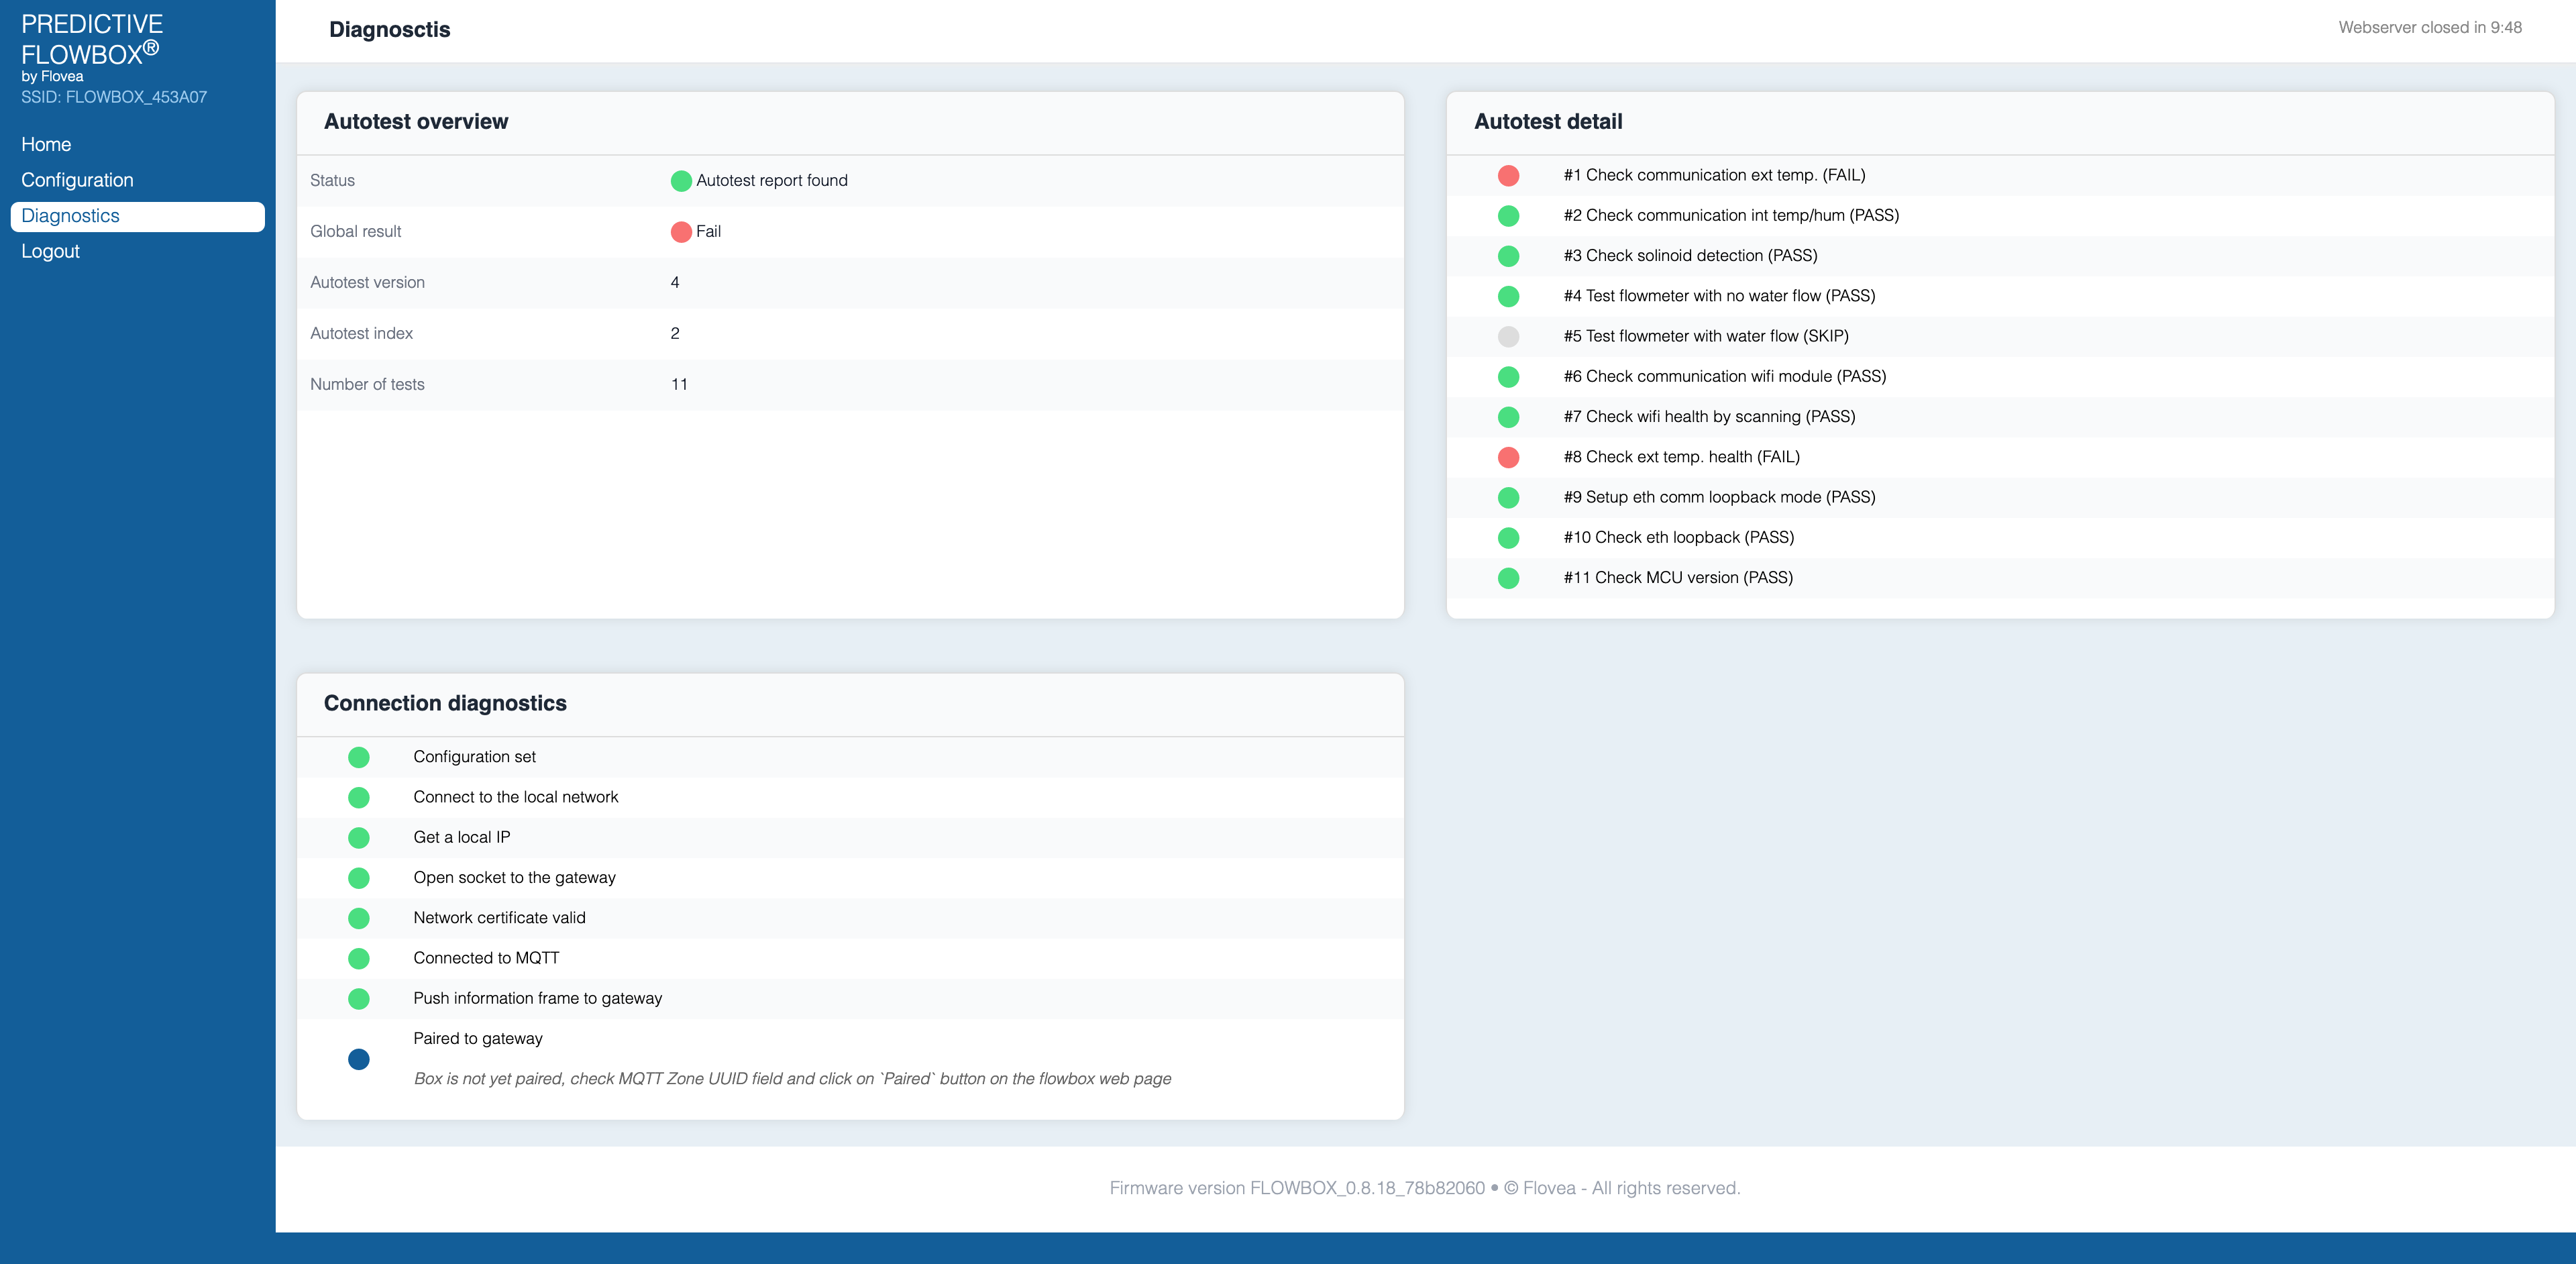
In the "Connection diagnostics", you can see that all steps are green except the last one. It means all the configuration is well applied, the FLOWBOX could connect to our platform. The blue circle for the last step is a work in progress task. FLOWBOX wait for the operator to confirm the pairing on the WebApp side.
The Autotest sections will inform you if the FLOWBOX is working as expected or if there are any issues.
Incorrrect zone input will lead to a FLOWBOX configuration reset
If you have filled an incorrect value for the zone (extra space, wrong zone identifier, etc), the FLOWBOX will be automatically configured back to the default configuration. Indeed, as the zone identifier is wrong or incorrect, you won't be able to finalise the pairing process.
So if after the reboot, the Flowbox fails to associate the zone input you made with an existing zone, you must configure the FLOWBOX from the begininng and set the correct zone identifier. Then you can resubmit the configuration and finalise the pairing process.